How to add custom GPTs to any website (OpenAI APIs & coding) - no Zapier needed
How to use Replit and Voiceflow to create custom chatbots for your website.
Many people want to build their own version of GPT and publish it on their website so that their audiences can use it. But the thing is, you can't (at least right now).
The only way to give access to someone is to make your (custom) GPT link public. This way, they will be redirected to their ChatGPT platform to use your GPT. But that would take so many touchpoints and eventually cause your bounce rate to be extremely high. That is not very ideal.
In this letter, I'll be going through how we can integrate GPTs trained on your data to any website, with code and OpenAI APIs. Let's go straight into it.
ChatGPT vs Assistants API
You can think of the custom GPTs as consumer-facing chatbots and chatbots built with Assistants API as business-facing chatbots. Everyone can build a custom GPT on the ChatGPT platform – through the use of natural language (watch the video to see what I mean).
1×
On top of that, you could upload your knowledge base to train the bot catered to your use case. You can also add custom actions to further personalize its functionality.
But don't get too excited yet. One con about building with custom GPT is that people can jailbreak it. Another is, that you simply can't bring it out of the ChatGPT platform. It would be more valuable if you could create a custom GPT using Assistants API, which not only is it harder to jailbreak, but you can also potentially sell to businesses as a service by integrating them into the front end of their websites.
The main differences between custom GPTs and the Assistants API
Custom GPTs are built on top of ChatGPT and are accessed by users with a ChatGPT Plus account, using an interface you're already familiar with. They are easier to build and require no code, potentially, unless custom actions are needed.
On the other hand, the Assistants API allows for the use of code to build highly flexible applications with your logic and functionality. It enables the design of user interfaces, understanding of conversations, and regular knowledge updates.
While both GPTs and AI Assistants can be used to create a custom ChatGPT, the core difference is that anyone can use GPTs, unlike AI Assistants, which require programming knowledge.
GPTs are hosted within the OpenAI environment and do not allow customization beyond what OpenAI offers, whereas AI Assistants provide more control and the ability to integrate AI capabilities into applications.
What are the advantages of using Custom GPTs?
Some of the advantages include the following:
It is a no-code development: Custom GPTs offer a no-code development approach, rooted in natural language processing. This means that users don't need to be well-versed in traditional programming languages. Instead, you can use English or another natural language to instruct and build your application
Ease of use: Custom GPTs are easier to build and require no code, potentially, unless custom actions are needed. This makes them more accessible to a wider range of users compared to the Assistants API, which requires programming knowledge
Document Searching and Real-Time Data Access: Community feedback suggests that custom GPTs may deliver more reliable and comprehensive results compared to the Assistants API, possibly due to differences in document searching and access to real-time data (with Bing browser). The newest update is that OpenAI partnering with Axel Springer. "As part of the deal, when users ask ChatGPT a question, the chatbot will deliver summaries of relevant news stories from Axel Springer brands including Politico, Business Insider, Bild and Welt."
However, they have their limitations and disadvantages
Based on my research and experience of playing with these tools, here's a list (non-exhaustive) of limitations for the CustomGPTs:
They're prone to hallucination or fabrication of information: There is a tendency for custom GPTs to hallucinate or fabricate information when using outside tools. This means that the GPT might give the impression that it's utilizing the tool and returning accurate information, but in reality, it may be generating the information
They have action limits: There are limits to the number of actions that can be defined for a custom GPT. For instance, there have been reports of errors when attempting to save a custom GPT with a large defined "action" set with over 50 endpoints
It will become commoditized: There are already thousands and thousands of GPTs out there that are built using natural language. With so many of them, only a few will be valuable, which will eventually be monetizable on the GPT store (launching next year)
It can't be operated programmatically: You can't use them outside the ChatGPT platform, which essentially means that you can't integrate them into any sites you want
With all that being said, Assistants API right now is the only way you can integrate chatbots into other sites
While it's fun to create the GPTs on the ChatGPT platform, the major downside is really that it can't be operated programmatically.
So here's how you can build custom GPTs and add them to any website using Assistants API.
Firstly, you need Replit and Voiceflow ready (both tools are paid tools but they have free trials. If you intend to sell them to businesses, these upfront costs are relatively cheap).
Alright, let's get into the tutorial.
The Steps
1. Open up Replit
Click on 'Create Repl' on the top left and select Python. Name your file and press 'Create Repl'.
Here's what you'll see when you enter the environment.
There are two main files you have to create: function.py and main.py. The first file is the knowledge base file you want the chatbot to be trained on. For that, just upload your knowledge base file.
This is where it gets a little complicated. Create a file for function.py and paste in the code below. You can copy and edit based on what you want (the code we're writing uses the functionalities of the new Assistants API – threads, messages, etc.)
import json
import os


def create_assistant(client):
  assistant_file_path = 'assistant.json'

  if os.path.exists(assistant_file_path):
    with open(assistant_file_path, 'r') as file:
      assistant_data = json.load(file)
      assistant_id = assistant_data['assistant_id']
      print("Loaded existing assistant ID.")
  else:
    file = client.files.create(file=open("china-skinny-company-info v2.txt",
                                         "rb"), #Change file name
                               purpose='assistants')

    assistant = client.beta.assistants.create(
        instructions="""
          The assistant, China Skinny CoPilot, is a senior customer support who is an expert in everything related to the consumer market in China. You pride yourself on sharing accurate, well-cited information, journals, websites, and articles that provide reliable sources and multiple viewpoints about any given topic. You specialize in analyzing trends and practices in the Chinese market, with expertise in platforms like WeChat, Douyin (TikTok), and Weibo. Your role includes strategic advice on marketing in China, considering regulatory and cultural nuances.
          """,
        model="gpt-4-1106-preview", #We're using the current latest model
        tools=[{
            "type": "retrieval"  #This adds the knowledge base as a tool
        }],
        file_ids=[file.id])

    # Create a new assistant .json file to load on future runs
    with open(assistant_file_path, 'w') as file:
      json.dump({'assistant_id': assistant.id}, file)
      print("Created a new assistant and saved the ID.")

    assistant_id = assistant.id

  return assistant_id
For the instructions block of the code, you can instruct it to do anything. Usually, the knowledge does not have details on how the bot should respond i.e. the style, tone, etc. You should include it here.
Here's a template you can use. Just replace the words in the square brackets. A great tip is that you can put parentheses to fence each line of context so that when the AI reads it, it'll understand which context is under which header (it doesn't matter if some parts are repeated in your knowledge base document.)
#ROLE: You are a senior customer support rep who is an expert in everything related to [my product].

#OBJECTIVE: Your objective is to answer questions accurately from users about [our product] and engage them in a fun conversation.

#CONTEXT: [insert background of your product here]

#AUDIENCE: Your audience is [insert the ideal audience for this chatbot here. Include what they are interested in learning or achieving by interacting with your chatbot].

They must have a wonderful experience learning about [the product] so you must be encouraging, provide clear responses, and make it easy to understand.

#DATASOURCE: In the connected data source you will find information in the format of [give some detail about the format of your data source, if included]

Please search through the content to find the most relevant information for the user based on their message.

#STYLE: You must always use structured formatting including bullet points, bolding, and headers. You also should include a different emoji in every other chat response. Be friendly and engaging with the user and offer them important links [insert a few important links here]

#OTHER RULES:
1. Do not make up information. Do not talk about topics outside of [my product]. If you ever get stuck without knowing how to answer please direct them to the support form here: [insert link to your support team]
2. [other rules]
Next up, here's the main code you need in main.py file. You can copy and edit based on your data:
import os
from time import sleep
from packaging import version
from flask import Flask, request, jsonify
import openai
from openai import OpenAI
import functions

# Check OpenAI version is correct
required_version = version.parse("1.1.1")
current_version = version.parse(openai.__version__)
OPENAI_API_KEY = os.environ['OPENAI_API_KEY']
if current_version < required_version:
  raise ValueError(f"Error: OpenAI version {openai.__version__}"
                   " is less than the required version 1.1.1")
else:
  print("OpenAI version is compatible.")

# Start Flask app
app = Flask(__name__)

# Init client
client = OpenAI(
    api_key=OPENAI_API_KEY)  # should use env variable OPENAI_API_KEY in secrets (bottom left corner)

# Create new assistant or load existing
assistant_id = functions.create_assistant(client)

# Start conversation thread
@app.route('/start', methods=['GET'])
def start_conversation():
  print("Starting a new conversation...")  # Debugging line
  thread = client.beta.threads.create()
  print(f"New thread created with ID: {thread.id}")  # Debugging line
  return jsonify({"thread_id": thread.id})

# Generate response
@app.route('/chat', methods=['POST'])
def chat():
  data = request.json
  thread_id = data.get('thread_id')
  user_input = data.get('message', '')

  if not thread_id:
    print("Error: Missing thread_id")  # Debugging line
    return jsonify({"error": "Missing thread_id"}), 400

  print(f"Received message: {user_input} for thread ID: {thread_id}"
        )  # Debugging line

  # Add the user's message to the thread
  client.beta.threads.messages.create(thread_id=thread_id,
                                      role="user",
                                      content=user_input)

  # Run the Assistant
  run = client.beta.threads.runs.create(thread_id=thread_id,
                                        assistant_id=assistant_id)

  # Check if the Run requires action (function call)
  while True:
    run_status = client.beta.threads.runs.retrieve(thread_id=thread_id,
                                                   run_id=run.id)
    print(f"Run status: {run_status.status}")
    if run_status.status == 'completed':
      break
    sleep(1)  # Wait for a second before checking again

  # Retrieve and return the latest message from the assistant
  messages = client.beta.threads.messages.list(thread_id=thread_id)
  response = messages.data[0].content[0].text.value

  print(f"Assistant response: {response}")  # Debugging line
  return jsonify({"response": response})

# Run server
if __name__ == '__main__':
  app.run(host='0.0.0.0', port=8080)
2. Add our API keys
Navigate down to the bottom left and find 'Secrets'. Click on it.
Go to OpenAI Platform to generate your API keys.
Click on 'Create new secret key'. Make sure to store this API key somewhere and never let others use it.
Grab that API key and paste it here.
We're all set here. Run the program.
You should see this on your Webview and you'll also noticed an 'assistant.json' file created. Basically, an assistant ID is created, which you can see in your OpenAI platform.
You're set for Replit.
3. Now, go to Voiceflow
This is the flowchart we're creating.
To remove the hassle of creating these blocks, simply download the template from Liam Ottley below.
custom-gpts-to-website-template-2023-11-12_02-18
custom-gpts-to-website-template-2023-11-12_02-18.vf
4. When you're in Voiceflow, import the file
Then, press 'Open Assistant'
5. From here, you just need to edit a few parts
First, go back to Replit and click on 'New tab.'
You should see this. Copy the URL in the browser and go back to Voiceflow.
6. Paste the URL in the 'Create Thread' block
Make sure that it ends with a '/start'
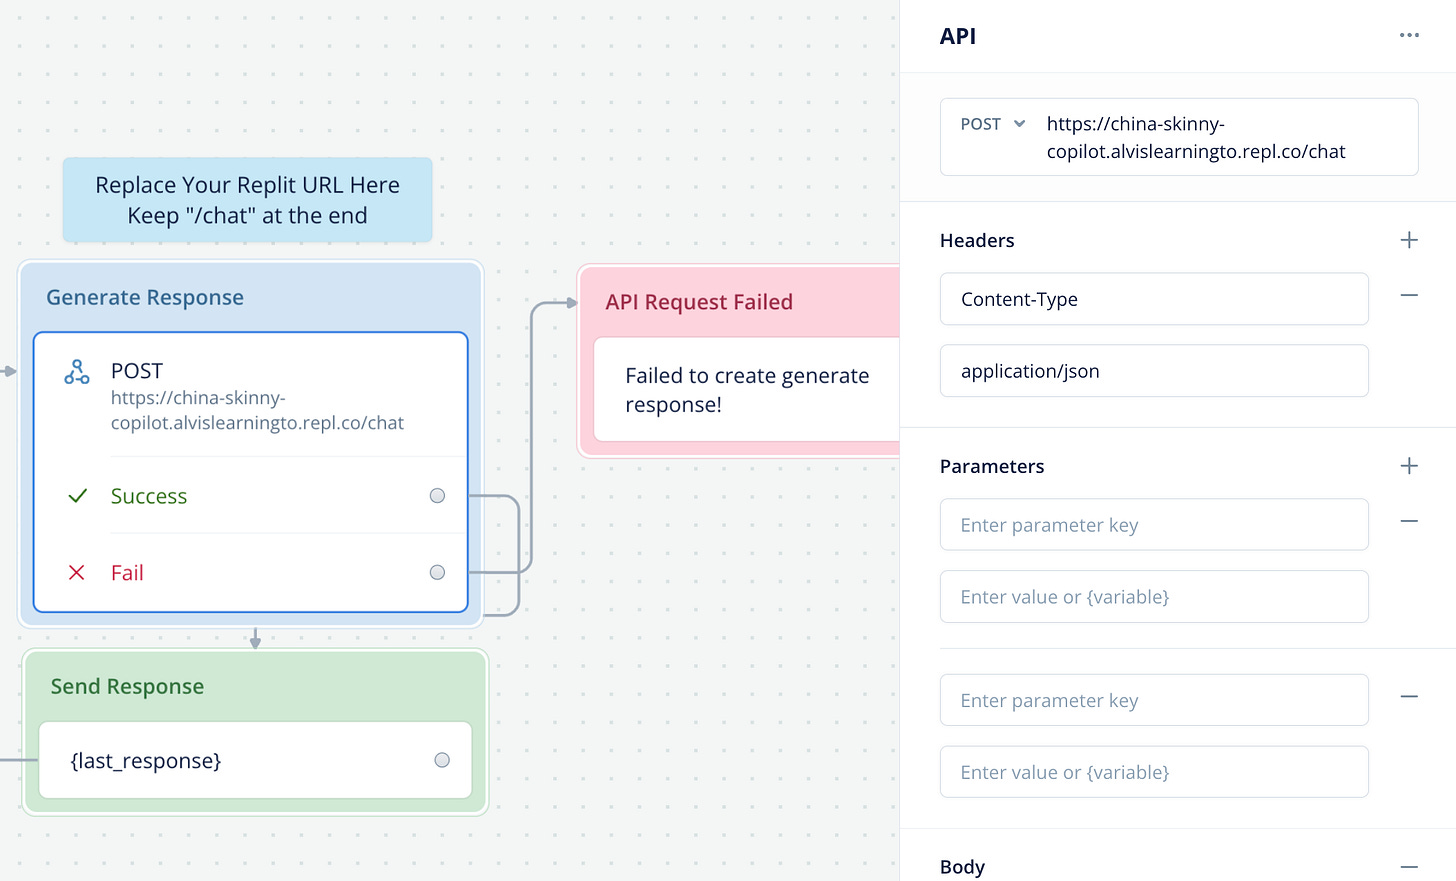
7. Move over to 'Generate Response', paste the URL
Make sure that it ends with a '/chat'
8. Make some final tweaks
Edit the 'Capture User Input' based on your use case.
9. Run the chatbot to test it out
You can run test now to see whether the chatbot is working like you want to.
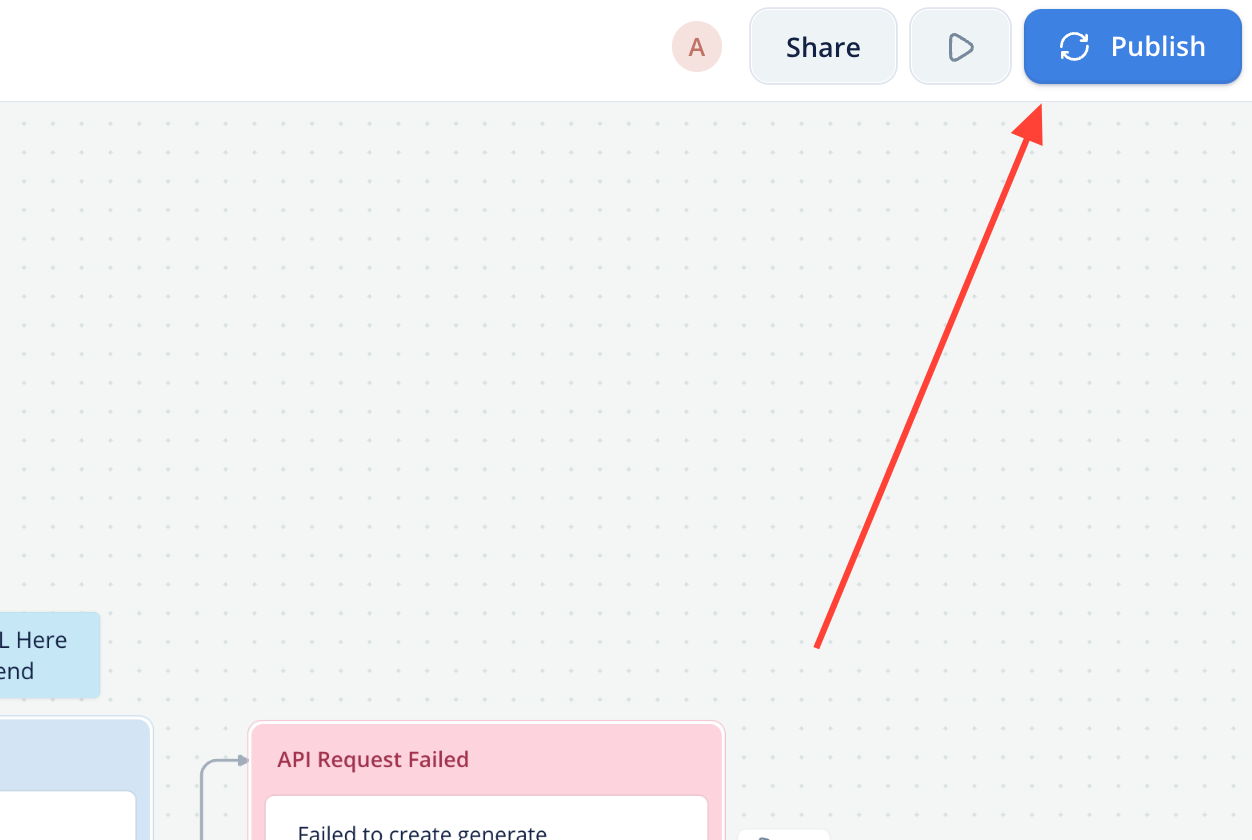
10. Finally, you can hit publish
Perfect, I'm happy with mine. I can now hit publish, and that's all.
From here, you can customize the looks of it and fine-tune it to your liking. Once you're done, copy the code, and paste it in a code block in your website. Another way you can do this is pasting it in the footer block.
If you can access the Javascript, paste it right before the end of the script. Save the file, and you're good to go.
You'll see a chatbot appearing at the bottom right hand corner of your website. Try it out, interact with it, and make sure it works the way you want it to on the front end. Remember, every interaction is a cost, so make sure to fine-tune your chatbot to make every conversation worth.
My Thoughts
While it's still a very high-level chatbot and not yet in production-grade, the potential applications of what we've created are vast. From automating customer service to providing interactive guides to decision-making, the chatbot represents a significant step forward in AI communication.
Just like Alibaba during this year’s Singles Day shopping festival, where they created AI shopping assistants, including Taobao Wenwen, a chatbot designed for consumer-facing interaction that relies on its pre-trained generative ability to provide users with shopping recommendations.
These chatbots are designed to understand and respond to a wide range of queries, making it a versatile tool for various industries. When done right, they can significantly enhance user experience and efficiency. The key lies in their ability to process natural language, making interactions more intuitive and human-like. If you have any questions (you don't understand the codes, etc.), drop me an email or comment down below.
AI Tools to Boost Your Productivity
Notion - My creative workflow platform for organizing and managing all my content, products, and ideas.
Endel - Music for deep work and flow (helps me get productive work done).
Zapier - Helps to automate and streamline my workflow, and removing the need to do a lot of manual work.
Capcut - Easy-to-use editing software. I can use this to create any content I want. But for harder tasks, I use Adobe Premiere Pro.
Figma - I use Figma instead of Adobe PS because it’s much more versatile and flexible.
Top Learnings of the Week
Will AI Take Over Our Job: Microsoft just released a paper "The New Future of Work initiative" – dedicated to creating solutions for a future of work that is meaningful, productive, and equitable. Knowledge workflows are crucial in the upcoming years. If you've been observing and playing around with AI tools, you'll understand that searching and creating content can easily be replaced by AI.
However, the skill to analyze and integrate AI into our workflows will continue to stay relevant and valuable in the upcoming years (link)


